Those who are associated with the accounting world are familiar with the word ‘Xero.’ And others who don’t have much knowledge about it, Xero is accounting software to let you get a faster and easy access to all your finance handling and invoice generating procedure.
Designed especially for small and medium scaled organizations, Xero has a series of beautifully customized templates to facilitate you. And the biggest highlight of this software is the availability of easily accessible payment methods and automatic reminders for different functions ranging from sheet preparations to invoice generation.
Though, it caters to countless accounting needs but generating an automatic invoice from Xero is the biggest reason why many accountants prefer it.
Xero Invoice Creation-
For an experienced accountant, generating an invoice is not a rocket science but this could be a vindicating situation for a newbie. To accomplish it, all you need is to click on accounts option displayed on the top of the screen then go to ‘sales.’ Select ‘New’ for every client invoice.
Initially, start with filling the form. This form needs to be filled with all the basic details of the client including- name, gender, contact info, date of the invoice, current time, address, etc. Filling these details will let you have a unique invoice number which is considered in case of product return or exchange.
Once you’re done with client’s details then comes adding the product details. This includes the name, nature, price, weight, etc of the product. Here, you’ve to keep an eye on the price and select the currency according to your country or region. It is necessary to be done, as the tax is calculated on the basis of currency selection.
Xero serves you with some amazing features like the draft, save or share invoice, where you have all the liberty to make changes in the filled invoice. But editing option only appears till you’ve either saved or drafted the invoice, once you generate it, you no longer have the access to make amendments to it. So, be wise and do it carefully.
Another best thing about Xero is, you can immediately share or send the generated invoice to the concerned person. This becomes possible with ‘email feature’ which lets you email the invoice to your client.
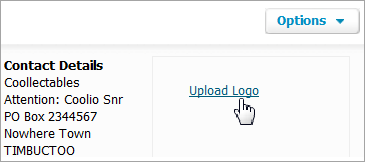
Now, Xero invoice has given you the liberty of inserting your business logo at the top of the invoice. This is one of the smart marketing techniques which is usually preferred by many businesses at present.
Steps to insert your logo on the Xero invoice.
It’s not a rocket science which is hard to do, just follow the below mentioned steps and you’re good to go.
Start with adding your business logo to the standard theme.
- Save logo on your PC.
- Save it as JPG, PNG or GIF.
- The file size should be less than 1 MB
Open Xero
- Go to settings
- Select general setting
- Click on branding theme
- Then click on ‘upload’ option
- Select picture from your system and upload it
- Now align the logo wherever you wish (right, center or left)
Spending some time on discovering Xero can actually let you know about some really cool features it has.